")
")
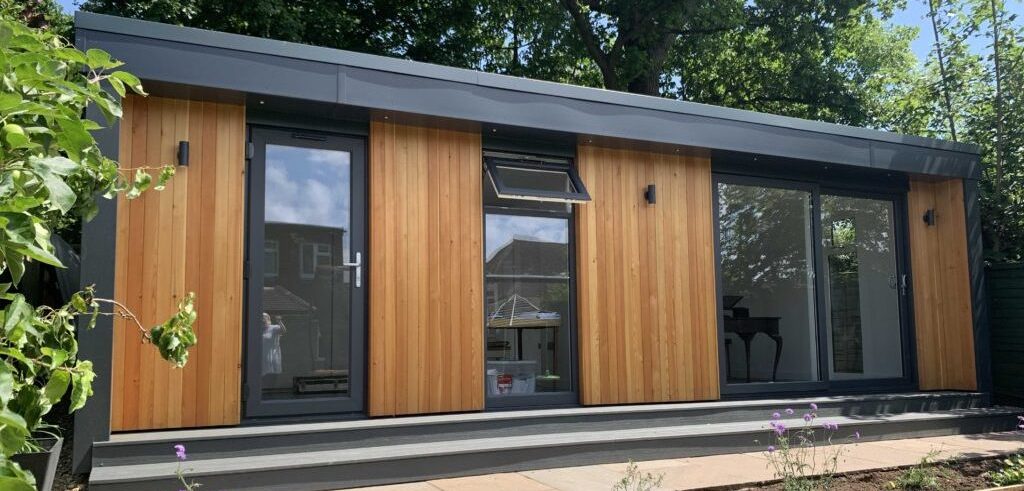
Getting Your Garden Room Project Right from the Start: A Planning Guide
Building a garden room is one of the most rewarding home improvement projects you can take on. Whether you want a quiet office away from the main house, a creative studio, or simply a place to relax surrounded by your garden, the end result can transform how you use your property. But getting there without unnecessary stress, delays, or budget overruns comes down to one thing: proper planning before any work begins. This guide walks you through the key stages of planning a garden room project, from early design decisions through to coordinating the build itself. Get these steps right and you will save yourself time, money, and a fair amount of frustration. Start with a Clear Purpose Before you look at a single brochure or floor plan, sit down and think carefully about what you actually need this space to do. A garden office has very different requirements from a yoga studio or a guest bedroom. The intended use shapes everything that follows, including insulation levels, electrical capacity, plumbing needs, window placement, and interior layout. Write a simple brief for yourself. Note down what the room will be used for, how many people will use it regularly, what furniture and equipment it needs to hold, and any features that are essential versus those that would simply be nice to have. This brief becomes your reference point for every decision you make going forward. It also helps to think about the future. Your needs may change in three or four years. A room designed with a bit of flexibility built in will serve you far longer than one that only works for a single narrow purpose. Understand the Regulations One of the most common mistakes people make is assuming a garden room does not need any kind of planning permission. In many cases, garden rooms fall under permitted development rights, which means you can build without a formal planning application. However, this depends on several factors: the size of the structure, its height, how close it sits to your boundary, and whether your property is in a conservation area or other designated land. Even when permitted development applies, you still need to comply with building regulations if the room will have electricity, plumbing, or fixed heating. Regulations cover structural safety, fire protection, ventilation, drainage, and energy efficiency. Ignoring them does not just risk a fine. It can also cause serious problems if you ever try to sell your home or make an insurance claim. Check with your local planning authority early in the process. If there is any doubt, consider getting a lawful development certificate. This gives you written confirmation that your project is permitted, which provides peace of mind and a useful document for future buyers. Get the Design Details Right Once you know what you are building and what is allowed, the design phase is where your project starts to take real shape. This is the time to work with a designer or architect who understands garden buildings. A good designer will help you make the most of the available space, orient the building to capture natural light, and choose materials that suit both the structure and your garden setting. Pay close attention to foundations. The type of foundation you need depends on your soil conditions, drainage, and the weight of the structure. Getting this wrong can lead to movement, cracking, or damp problems later on. A site survey before design work begins is always worthwhile. Think about services early as well. Running electricity, water, or data cables from your main house to the garden room requires trenching, ducting, and connection work. Planning these routes during the design stage avoids costly changes once construction is underway. Organise Your Project Documentation This is the area where many garden room projects run into avoidable problems. Poor documentation leads to misunderstandings between you and your builder, missing information during construction, and decisions being made on the fly rather than based on a clear plan. At a minimum, your project should have a complete set of drawings showing dimensions, materials, and construction details. You should also have a written specification covering everything from the type of cladding to the grade of insulation. If several trades are involved, a simple schedule showing who needs to be on site and when prevents clashes and delays. For larger or more complex garden room projects, it is worth thinking about how your project information is managed as a whole. Professionals in the construction industry use structured approaches to keep design data accurate and consistent throughout a project. A bim audit is one example of this kind of quality check, ensuring that all project information is complete, coordinated, and free from conflicts before construction begins. While this level of rigour is more common on commercial projects, the underlying principle applies to any build: verify your information before you start spending money on materials and labour. Keep all your documents in one place, whether that is a physical folder or a shared digital workspace. Include contracts, quotes, receipts, warranty documents, and any correspondence with your local authority. You will be glad you did if questions arise months or years later. Choose Your Builder Carefully The right builder makes an enormous difference to your experience and the quality of the finished room. Look for someone with proven experience in garden room construction specifically. General builders can certainly do the work, but a specialist will understand the particular challenges of these structures, from dealing with limited site access to ensuring a timber frame building is properly sealed against moisture. Ask for references and go and see previous projects in person if possible. Check that your builder carries adequate insurance, including public liability and employer’s liability cover. Get a detailed written quote rather than a rough estimate, and make sure the quote covers everything you have discussed, not just the obvious items. Agree on a payment schedule tied to completed milestones rather than calendar dates. This protects both you and
Getting Your Garden Room Project Right from the Start: A Planning Guide Read More »