

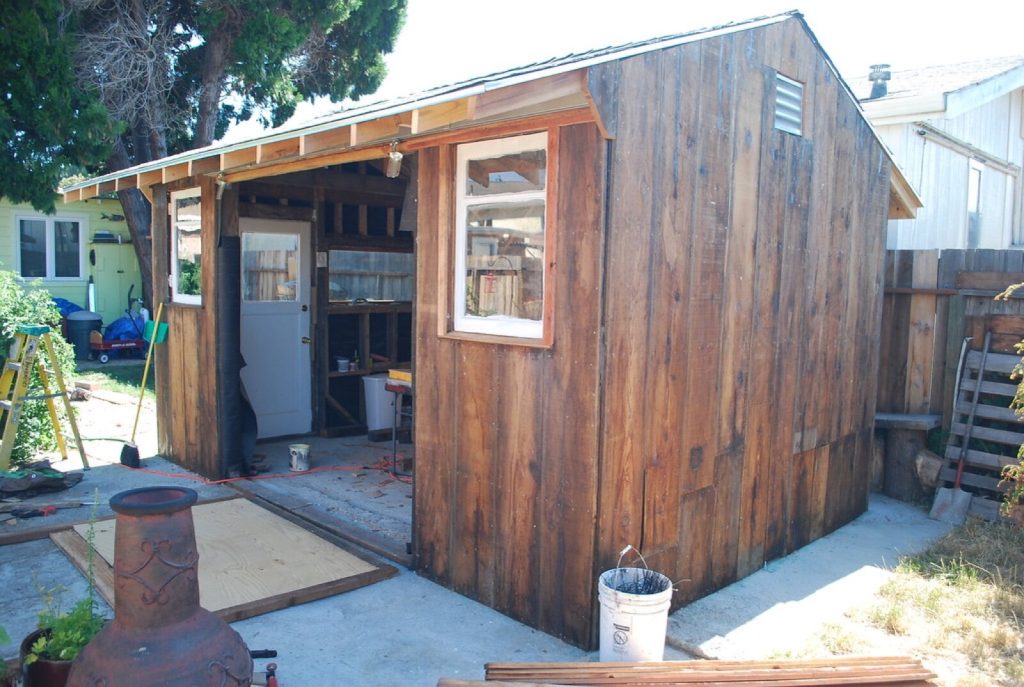
How to build a garden shed comes down to four jobs done in order: a level base, a floor frame that sits clear of the wet, four stud walls squared and braced, and a roof that sheds water past the cladding. Get the first two right and an amateur build will outlast a lot of flat-pack sheds. Get them wrong and no amount of paint will save it. This walk-through covers a simple pent or apex shed up to about 8x6ft (roughly 2.4m by 1.8m), the size most people build themselves, and flags the rules and timber grades that decide whether it lasts five years or twenty-five.
Before you buy timber: the rules that set the size
Most garden sheds need no planning permission because they fall under permitted development for outbuildings. The limits that matter, from the Planning Portal’s outbuildings guidance, are:
- 2.5m maximum height for any building within 2m of a boundary. This is the one that catches DIY builds, because an apex roof on a 2m-high wall can easily top 2.5m.
- 2.5m maximum eaves height anywhere, and an overall height of 4m for a dual-pitched roof or 3m for any other roof shape, if the shed sits further back.
- Single storey only, with no veranda, balcony or raised platform over 0.3m.
- Not forward of the principal elevation of the house, and no more than half the land around the original house covered by extensions and outbuildings combined.
- Listed buildings and designated land (National Parks, the Broads, National Landscapes, World Heritage Sites) have tighter rules; within the curtilage of a listed building any outbuilding needs permission.
Our page on planning permission for a garden shed covers the edge cases. On building regulations, a detached shed with a floor area under 15 square metres and nobody sleeping in it is exempt, which covers every shed in this article. If you are drifting towards something bigger, with power and insulation, read the 15, 30 and 1m rules for garden rooms first.
Design the height before anything else. Work backwards from 2.5m: subtract the base, the bearers, the floor and the roof build-up, and what is left is your maximum wall height at the high side.
Step 1: build a base that stays level
The base is where most home-built sheds fail, usually slowly. A floor that sits on soil wicks moisture, a base that is out of level racks the frame so doors stop closing, and a slab that sticks out well beyond the walls catches rain and splashes it back onto the bottom boards. Three bases work well:
- Concrete slab. The most durable option. The usual specification is about 100mm of C20 to C25 concrete laid on 75mm to 100mm of compacted MOT Type 1 hardcore, so you dig out roughly 200mm. Keep the slab close to the size of the floor frame, with only a small margin, and give the top a slight fall so water runs off rather than pooling under the shed.
- Paving slabs on a sand and cement bed. Quicker and easier to level for one person, and fine for a lightweight shed. Lay them on compacted hardcore, not straight onto soil.
- Plastic grid base filled with gravel. Free-draining, light to carry through a house and good on awkward ground, as long as the ground under it is compacted and levelled first.
Whichever you pick, check it with a long spirit level across both diagonals, not just along the edges.
Step 2: bearers and floor frame
The floor should never sit directly on the base. Lay pressure-treated bearers across it, running at right angles to the floor joists, so air can move underneath and water can drain away.
Treated timber in the UK is sold against “use classes” set out in BS 8417. Use Class 3 is for exterior timber above ground. Use Class 4 is for timber in contact with the ground, frequently wet, or providing exterior structural support, which the Wood Protection Association spells out in its “Make sure it’s 4” guidance. Shed bearers sit at ground level, stay damp for long periods and carry the whole building, so buy them as Use Class 4 and ask the merchant to confirm it. The cheap green timber sold for general garden jobs is often only treated to Use Class 3.
Build the floor as a rectangular frame with joists at 400mm to 600mm centres, check the diagonals, then deck it with tongue-and-groove floorboards or a moisture-resistant board such as OSB3. Any end you cut on treated timber exposes untreated wood inside, so brush preservative onto every cut end before it goes in.
Step 3: frame and clad the walls
Build each wall flat on the floor deck, then stand it up. Every wall has a bottom plate and a top plate with vertical studs between them. A common specification for a tool shed is 47x75mm treated studs at 600mm centres. Drop to 400mm centres if you plan to line the inside with boards or fit insulation later, because it gives far more fixing points and less flex.
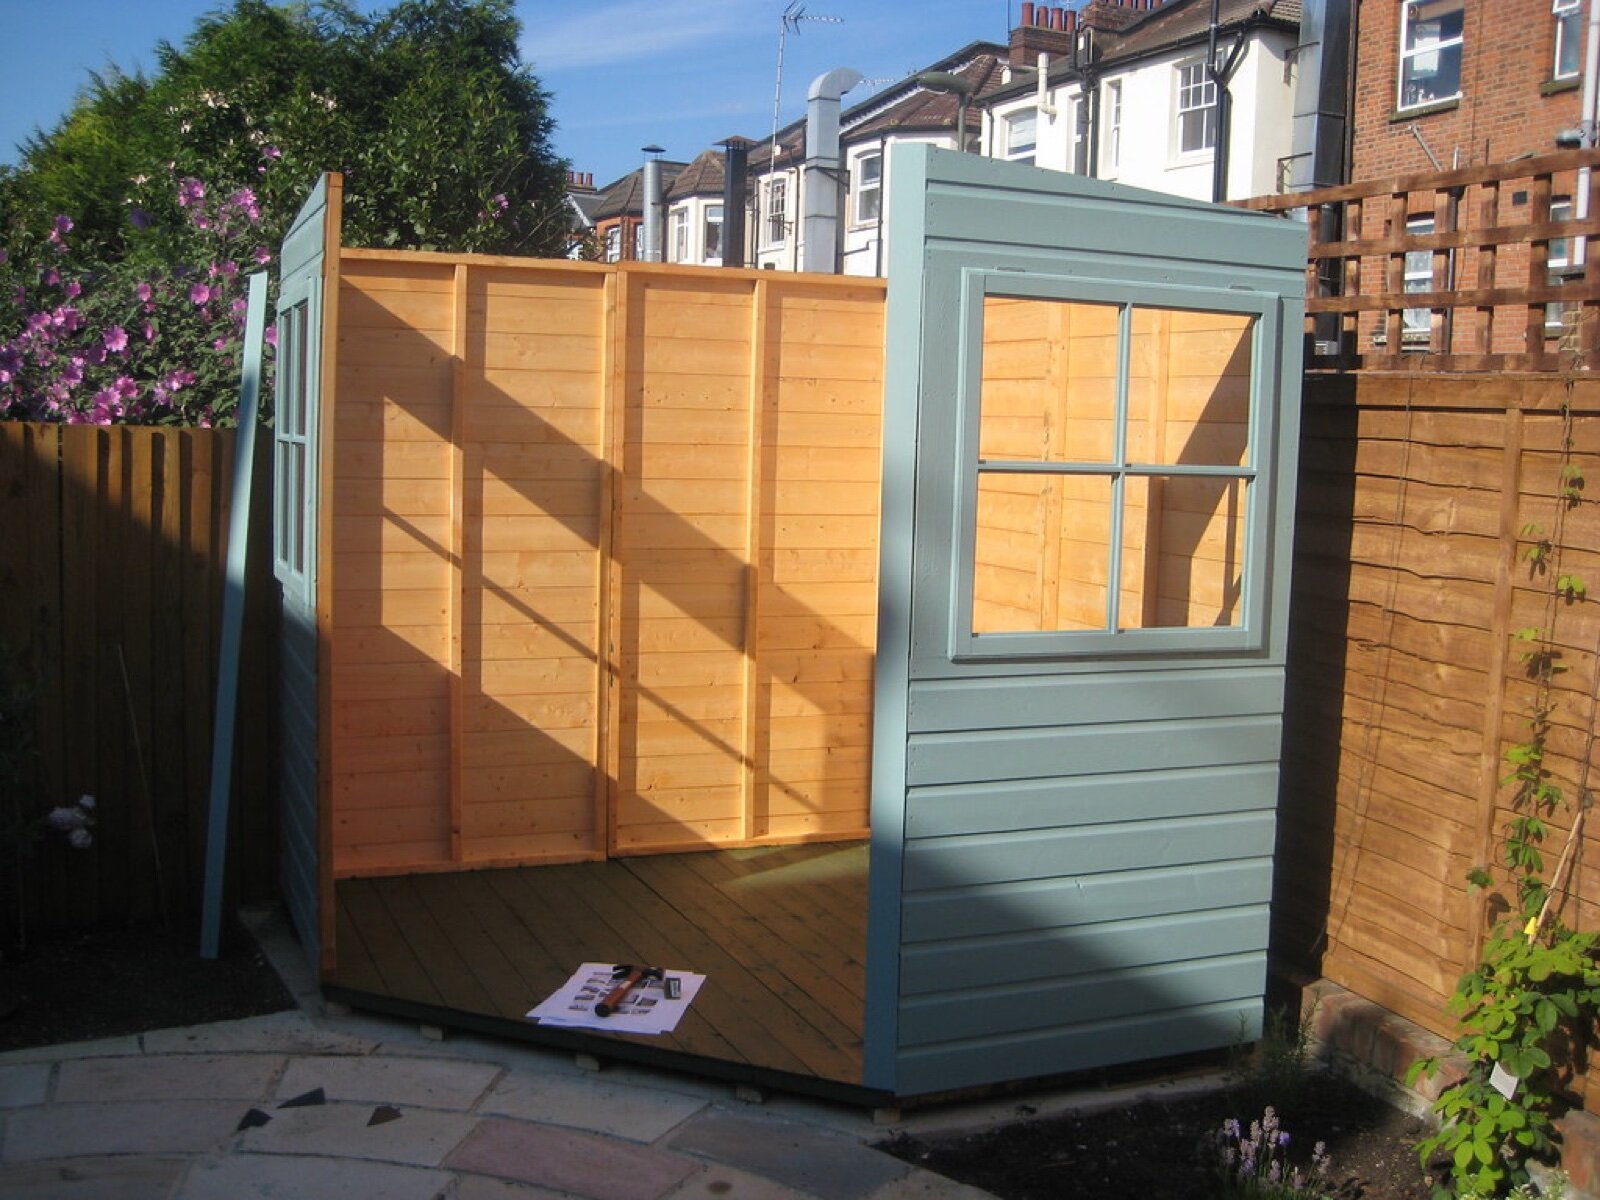
- Frame the openings first. Put a full-height stud each side of the door, plus a header across the top. Windows need a sill and a header too.
- Brace every wall. Noggins between studs stop them twisting. Sheathing the frame in 9mm OSB before cladding stiffens it much more, though many basic sheds skip this and rely on the cladding plus a diagonal brace.
- Stand, plumb and fix. Screw the bottom plates down through the floor into the joists, check each wall is plumb with a level, then screw the corners together and tie the walls with a second top plate that overlaps the corners.
- Clad from the bottom up. Shiplap or tongue-and-groove boards go on with the tongue facing up so water runs off rather than into the joints. Let the lowest board overhang the floor frame slightly so rain drips clear of the base. Use galvanised or stainless fixings outside: plain steel nails stain the timber and rust through.
Step 4: the roof
A pent roof (a single slope) is the easiest to build: make the front wall taller than the back and run rafters between them. An apex roof looks more traditional and gives more headroom in the middle but needs a ridge and paired rafters cut to the same angle, so make one pair as a template and copy it. Either way, keep the 2.5m limit in mind if the shed sits within 2m of a fence.
Deck the rafters with roof-grade board; 12mm OSB is a common choice for sheds because it is stiffer than the 9mm often used on walls. Let the roof overhang the walls on all sides so rain drips clear of the cladding, and fix fascia boards to finish the edges. Covering it is a separate decision, and the right material depends mostly on the pitch you have built: our page on felt, EPDM or Onduline for a shed roof sets out which one suits which slope.
Step 5: door, windows and finishing
A ledged and braced door is the standard shed door and the easiest to make: vertical boards held by three horizontal ledges, with diagonal braces between them. The braces must run upwards from the bottom hinge side towards the latch side, so they push the weight back to the hinges; fit them the other way and the door sags within a season. Hang it on strong T-hinges with enough clearance at the bottom to clear the floor when the timber swells in winter.
For windows, styrene and polycarbonate are lighter and safer for a DIY build than glass. If you use glass, use toughened safety glass, particularly in a door or low down. More on glazing: shed and summer house doors and windows.
Finish the outside with an exterior wood stain or paint and redo it every few years, paying most attention to the bottom boards and the end grain at the corners.
The mistakes that shorten a shed’s life
- Floor on the ground. No bearers, or bearers that sit in a puddle, rot the floor first and then the bottom of every stud.
- Use Class 3 timber where Use Class 4 belongs. It looks the same in the yard. It does not last the same in the ground.
- A base bigger than the shed. A wide lip collects rainwater against the cladding all winter.
- Too tall for the boundary. An apex shed a metre from a fence that tops 2.5m needs planning permission you did not apply for.
- No ventilation. A sealed timber box sweats. A small vent high on each gable or under the eaves keeps tools dry; if you insulate later, see our notes on the 25mm gap that stops damp.
For more on buying versus building outbuildings, browse the rest of Best Garden Room.
Frequently asked questions
Is it cheaper to build a garden shed than to buy one?
For a small, basic shed, usually not by much, because flat-pack makers buy timber in bulk. Building your own pays off when you want something a standard kit does not offer: thicker framing, a specific size to fit a gap, a better floor, Use Class 4 bearers, or a door where you want it.
What size timber do I need to frame a shed?
A common specification is 47x75mm treated timber for the wall studs at 600mm centres, closing to 400mm centres if the inside will be lined or insulated. Bearers under the floor should be Use Class 4 treated timber because they sit at ground level.
Do I need planning permission to build my own shed?
Usually not. A shed built under permitted development must be single storey, no taller than 2.5m within 2m of a boundary, no taller than 4m (dual-pitched roof) or 3m (other roofs) elsewhere, and not in front of the house. Listed buildings and designated land have tighter rules.
Can I build a shed without a concrete base?
Yes. Paving slabs on compacted hardcore or a gravel-filled plastic grid base both work for most sheds, provided the base is level and the floor sits on treated bearers rather than directly on the ground.
How long does it take to build a garden shed?
Allow a day for the base, plus curing time if it is concrete, then two to three days for the floor, walls, roof and door. You will want a helper to lift the walls and roof.
Does a garden shed need building regulations approval?
Not if its floor area is under 15 square metres and nobody sleeps in it. Bigger outbuildings up to 30 square metres can also be exempt depending on their distance from the boundary and the materials used.
Related guides
- Garden Room Planning Permission UK: The 30m² and 50% Rules Explained
- How Much Does a Garden Room Cost to Run in Winter? Real UK Figures
- Garden Room vs Extension: Honest Cost, Value and When Each Wins
- How Much Does It Cost to Run Electrics to a Garden Room in 2026?
- Ground Screws vs Concrete Base: Which Garden Room Foundation Is Right for You?
- Do Garden Rooms Need Building Regulations? The 15, 30 and 1m Rules Explained
- Prefab vs Bespoke Garden Rooms: Which Is Right for You?
- Garden Room Buying Mistakes: 12 Costly Errors to Avoid
- Garden Room News: June 2026
- How to Buy a Garden Room: The Complete UK Buyer’s Guide (2026)
- What to Look for in a Garden Room: 15 Things to Check Before You Buy
- Buying a Second-Hand Garden Room: Is It Worth It?
- Garden Room Kits vs Fully Installed: Should You Self-Build or Buy Turnkey?
- Garden Room Deposits, Contracts and Deliverables: Protecting Your Money
- How Long Does a Garden Room Last? Lifespan and Maintenance
- Garden Room Cost Per Square Metre: 2026 UK Rates Explained
- How Much Does a Garden Room Cost in the UK? (2026 Price Guide)
- Garden Room Prices by Size: From 3x3m to 8x4m and Beyond
- How Much Does a Garden Office Cost? (2026 UK Breakdown)
- Garden Room Planning News: Late June 2026
- How Much Does a Garden Room with a Bathroom Cost?
- Hidden Garden Room Costs: Foundations, VAT and the Extras Quotes Miss
- Garden Room Finance: Loans, Mortgages and Payment Options Explained
- Garden Room News: Early July 2026
- Do Garden Rooms Add Value to Your House? What the UK Resale Data Shows
- Permitted Development Rights for Garden Rooms: Size, Height and the 2m Boundary Rule
- Do Garden Rooms Affect Council Tax? Business Rates and Reassessment
- Garden Room News: Mid-July 2026
- How a Garden Room Is Built: Foundations to Finish (UK Guide)
- SIPs vs Timber Frame Garden Rooms: Which Construction Is Better?
- How Close to a Boundary Can a Garden Room Be? UK Rules Explained
- How to Apply for Garden Room Planning Permission: Step by Step
- Can You Build a Garden Room on Decking, Slabs or a Patio?
- Is a Garden Room Cheaper Than an Extension? 2026 Cost Comparison
- Garden Room News: Mid-July 2026
- Garden Room Cladding: Cedar vs Composite vs Larch vs Render
- Garden Room Roof Guide: Flat vs Pitched and the Best Materials
- Garden Room Windows and Doors: Bifold, Sliding and Glazing
- How to Build a Garden Room: A DIY Step-by-Step Guide (UK)
- How Long Does It Take to Build a Garden Room?
- How to Make a Garden Room Usable All Year Round
- Garden Room Insulation: Best Materials and U-Values for the UK
- How to Heat a Garden Room: 9 Options Compared by Cost and Warmth
- Best Heating for a Garden Office: Warm Without a Huge Bill
- Air Conditioning for Garden Rooms: Cooling and Heating in One
- Stopping Condensation and Damp in a Garden Room (UK Guide)
- How to Get Wi-Fi in a Garden Office: 6 Ways That Actually Work
- Garden Office Ideas: Designing the Perfect Work-From-Home Space
- Garden Room Ideas: 20 Popular Uses to Inspire Your Build
- Garden Room Annexe: Rules, Costs and How to Build One
- Garden Bar Ideas: The Height Rules, Power and Layout
- Garden Room Business: What Changes Once Clients Visit
- Garden Studio Ideas: Sizes, Light and the 2.5m Rule
- Garden Room Lighting: IP20 Inside, IP65 Out, Part P Rules
- Landscaping Around a Garden Room: the 30cm Decking Trap
- Garden Room Design: Why 2.5m Decides Everything
- Garden Room Planning Permission: the 2.5m Boundary Rule
- Garden Room News: New NPPF Lands, PD Rules Unchanged
- Garden Saunas UK: Planning, Building Regs and Electrics
- Best Garden Room Companies UK: Guarantees of 10 to 25 Years
- Garden Room Electrics: The Rules Change on 15 Oct 2026
- Golf Simulator Garden Room: The 2.5m Rule That Stops It
- Garden Screens: the 2m Rule, and Why Trellis Counts
- Cheap Garden Rooms: What 19mm Walls Really Get You
- Green Retreats Review: 12-Year Cover, 60% Upfront
- Booths Garden Studios Review: Steel Build, 25 Years
- Eden Garden Rooms Review: £23,500 Start, 10-Year Cover
- Green Retreats vs Booths: 25-Year Steel or Timber?
- Garden Rooms London: 6 Companies and the 2.5m Limit
- Garden Room Bedroom: Why a Bed Changes the Rules
- Do I Need Planning Permission for a Garden Shed? Usually Not
- Garden Room News: Staged Payments Arrive, Timber Stays Dear
- Garden Gym Ideas: Sizes, Ceilings and the 2.5m Height Rule
- Garden Gazebo Rules: 2.5m Near a Boundary, 4m Max
- Garden Arch: Wood or Metal, and the 2.7m Height Rule
- Garden Arbour: Sizes That Seat Two, and Wood vs Metal
- Wooden Garden Gates: Sizes, UC4 Posts and the 1m Rule
- Garden Room News: Rates Held, Materials Up 5.9%
- Summer House Interior Ideas: 9 That Work in Winter
- Garden Trellis Panels: the 2m Rule Most Buyers Miss
- Garden Shelters: Six Types and When You Need Permission
- Garden Greenhouses: Glass Gives 90% Light, Plastic 80%
- Summer House Doors and Windows: 4mm Toughened or Styrene?
- Log Stores: Size, Siting and the 20% Moisture Rule
- Garden Shed Roof: Felt, EPDM or Onduline by Pitch
- Insulated Garden Shed: The 25mm Gap That Stops Damp
- Composite Garden Sheds: Rot-Proof, But Check These 6 Things